Uploading a custom avatar for the chat header and launcher
Go to Apps → Vosaire: AI Chatbot & Sales → Widget → Design → Appearance → Avatar. By default, Vosaire shows an initial-letter avatar (a colored circle with the first letter of your agent's name) in the chat header. Uploading your own image replaces it everywhere that avatar appears — and unlocks it as a launcher icon option too.
Before you upload
Until you upload an image, the Avatar option in the Launcher's icon picker is grayed out and can't be selected — there's nothing to show yet.
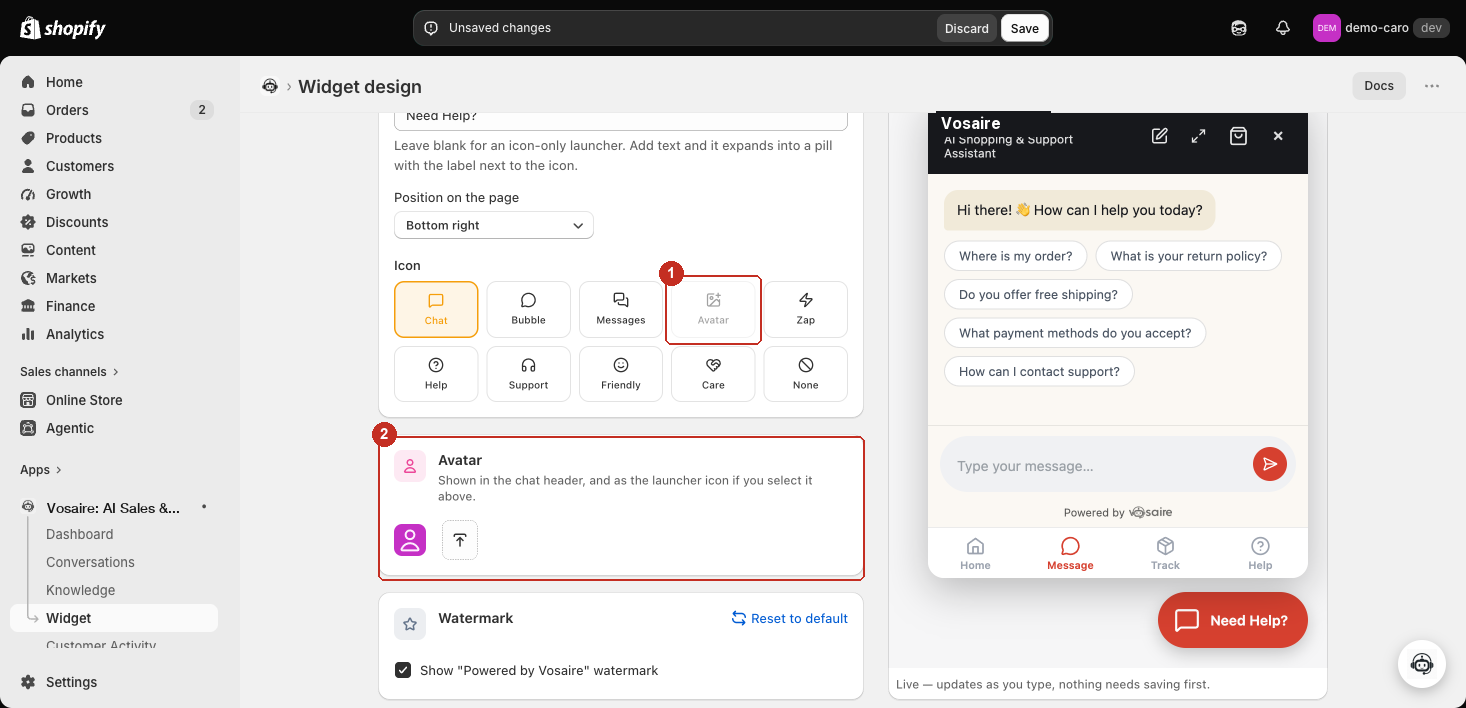
- The Avatar icon option in Appearance → Launcher is disabled until an image exists.
- The Avatar card itself: a preview of the current (default) avatar, and Upload image — accepts PNG, JPEG, GIF, or WEBP.
After you upload
Click Upload image and pick a file. It saves immediately — no need to click Save in the top bar — and updates in three places at once.
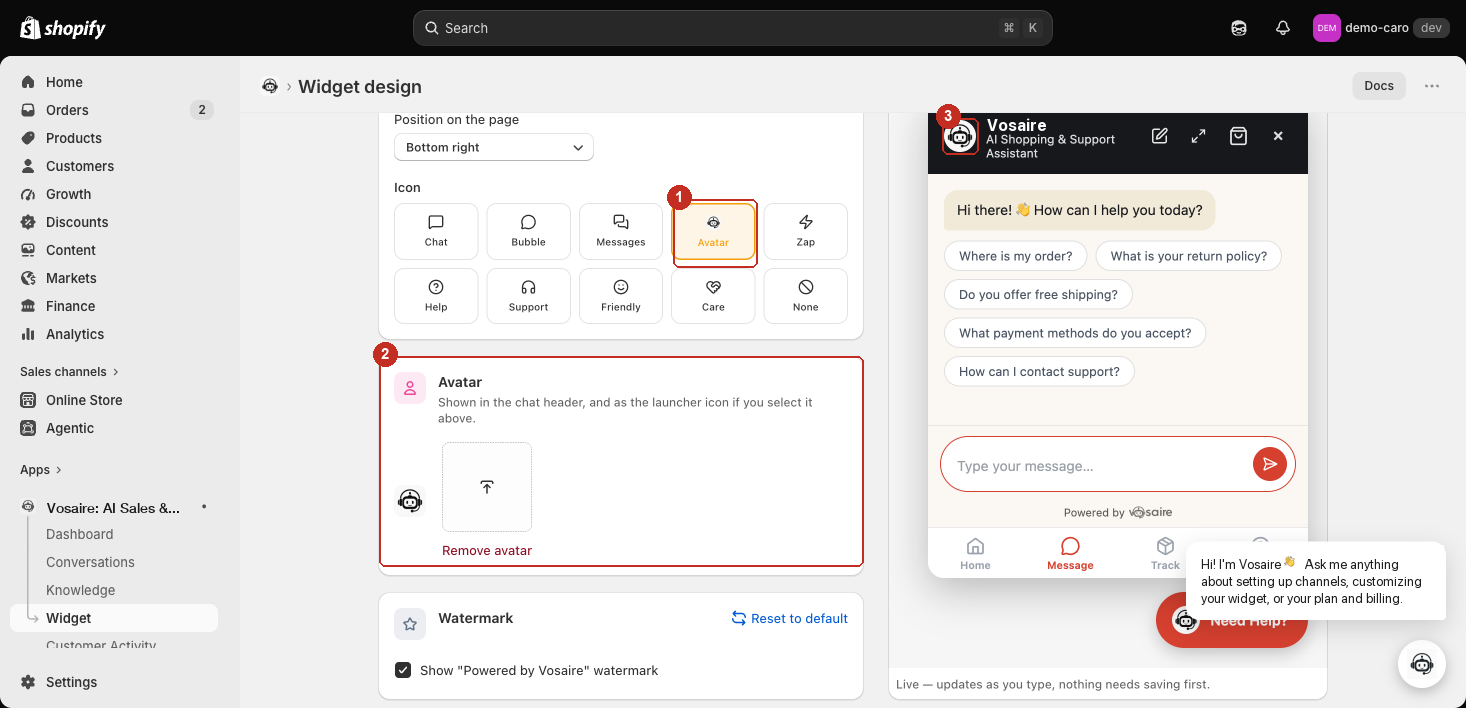
- The Avatar option in the Launcher icon grid is now selectable (it just isn't picked yet — see below).
- The Avatar card shows your uploaded image plus a Remove avatar link, which reverts to the default initial-letter avatar.
- The chat header (shown here in the Live preview) always uses your uploaded avatar, regardless of what's picked as the launcher icon.
Using it as the launcher icon
The avatar being uploaded doesn't automatically change your launcher button — that's a separate choice. Go to Appearance → Launcher → Icon and click Avatar to select it.
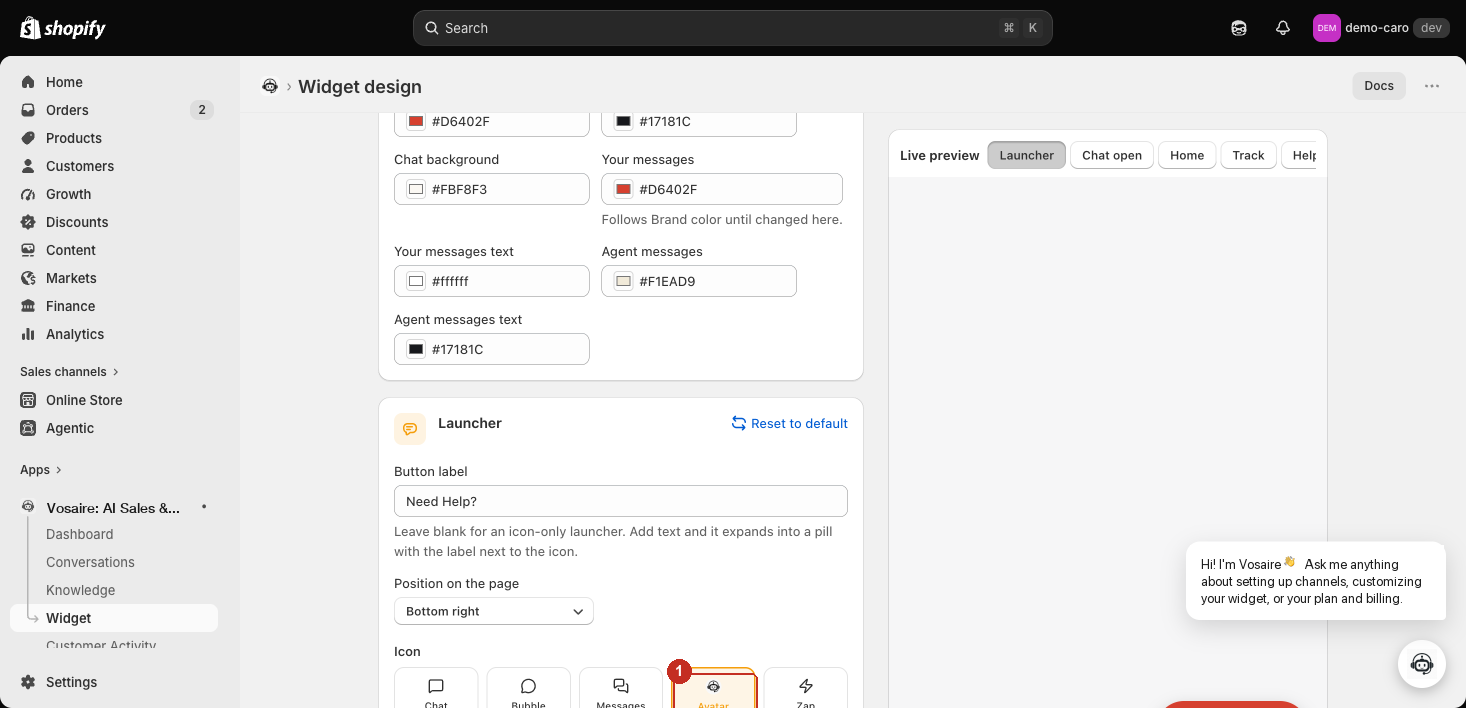
- Avatar is now the selected icon (highlighted, like any other icon choice).
- Switch the Live preview to its Launcher view to see the actual floating button — it now shows your avatar image instead of a generic icon.
This needs Save in the top bar to take effect on your storefront, same as any other Launcher setting. If you later remove the avatar while it's still selected as the launcher icon, the launcher falls back to the default chat icon automatically rather than showing something broken.