Connecting Gmail with your own Google Workspace app
If your Gmail channel keeps asking you to reconnect every few days, or your address isn't on Vosaire's beta whitelist yet, you can skip both problems by connecting with your own Google Cloud OAuth app instead of Vosaire's shared one.
This only works for a Google Workspace address (e.g. you@yourcompany.com) — not a plain @gmail.com account. If you use a personal Gmail address, use Connecting Gmail instead.
Why this fixes the 7-day reconnect problem
Google requires every third-party app to complete a security review before it can be used freely. While Vosaire's own review is in progress, its shared Gmail app is limited to whitelisted test accounts, and Google expires those accounts' access tokens every 7 days — which is why a whitelisted connection sometimes needs reconnecting.
Google Workspace has a separate option that sidesteps this entirely: an OAuth app whose consent screen is set to Internal is restricted to users on your own Workspace domain, and Internal apps are exempt from Google's verification pipeline altogether — no security review, no whitelist, and no 7-day token expiry.
Setup
1. Create (or switch into) a Google Cloud project
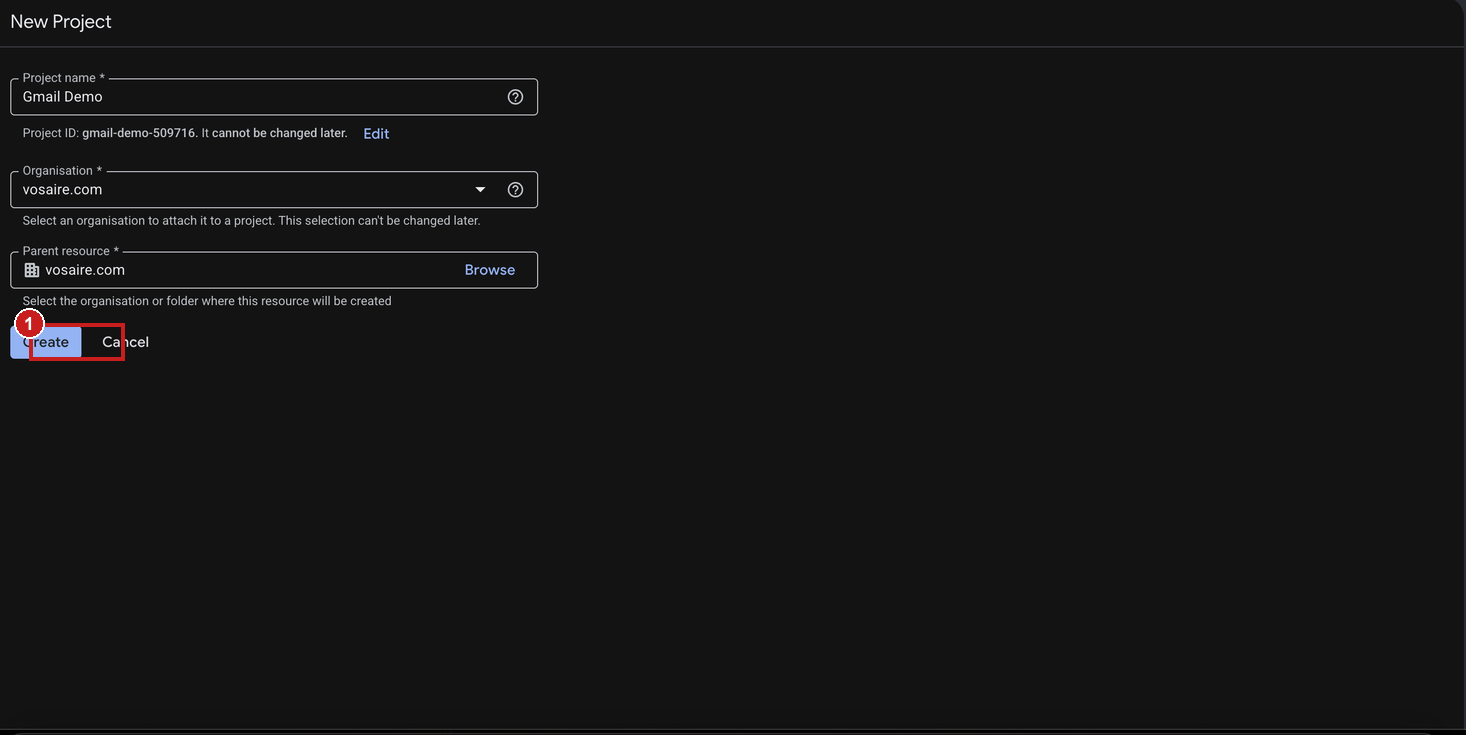
Go to Google Cloud Console while signed in as a user on your Workspace domain, and create a new project — name it whatever you like, attach it to your organisation, and click Create.
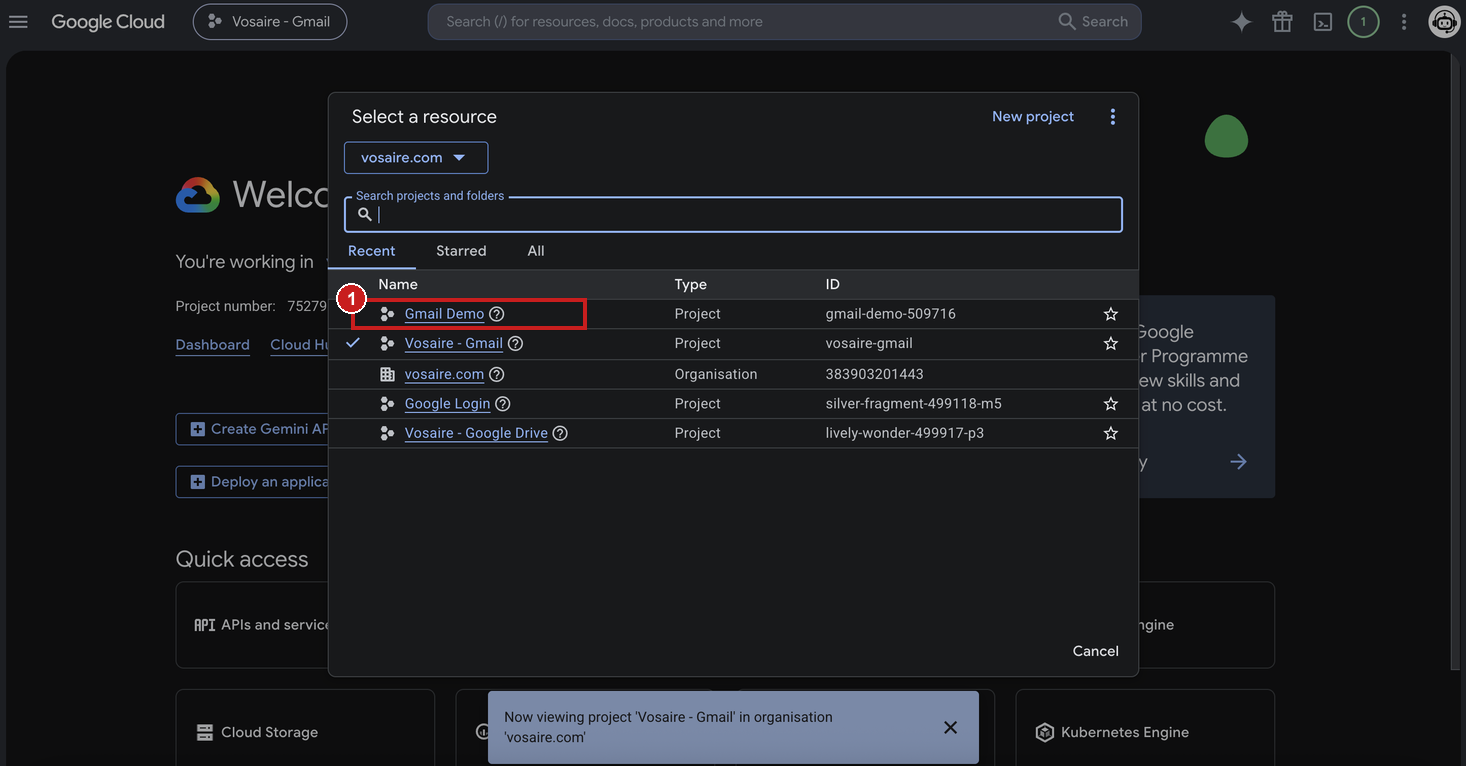
Once it's created, switch into it from the project picker at the top of the page.
2. Enable the Gmail API
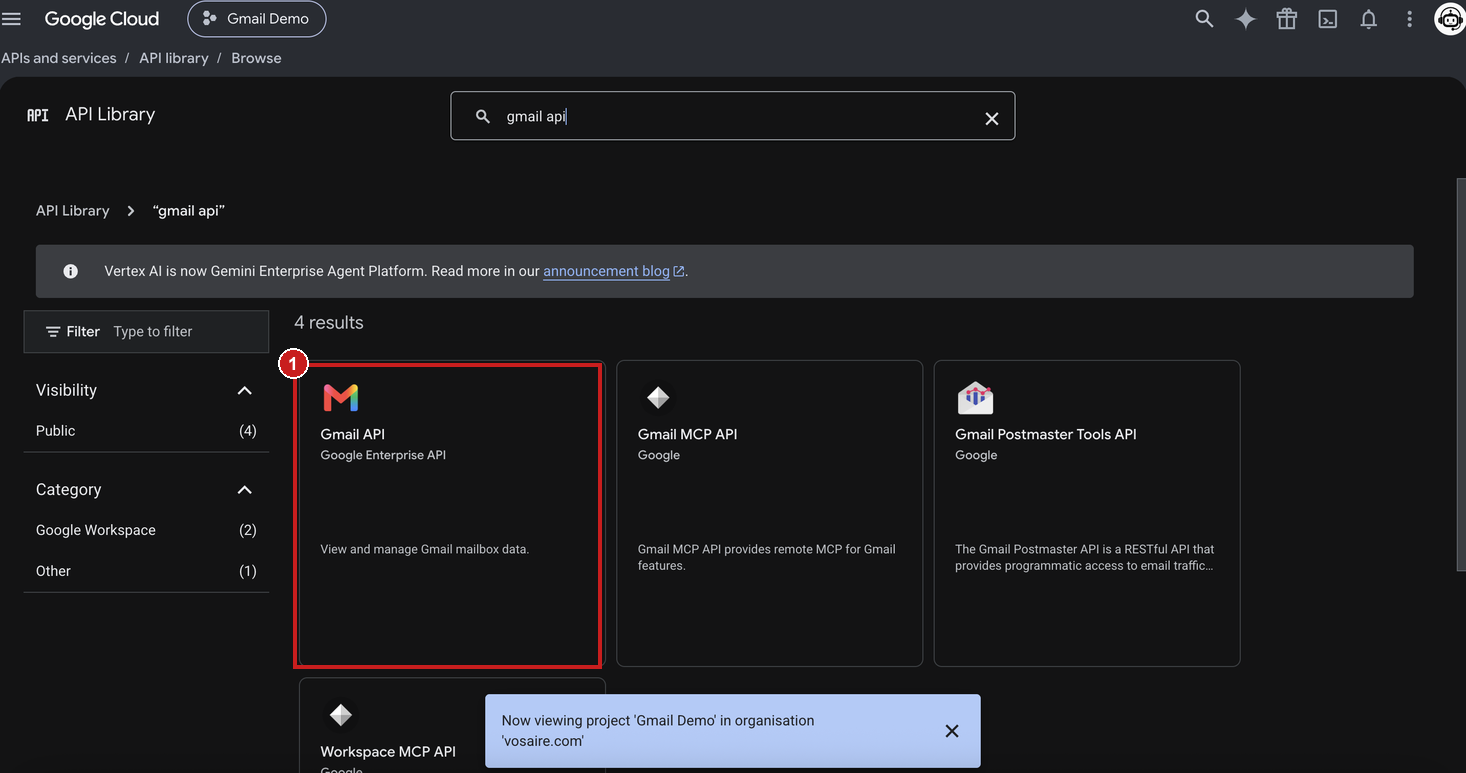
Go to APIs & Services → Library, search "gmail api", and open the Gmail API result.
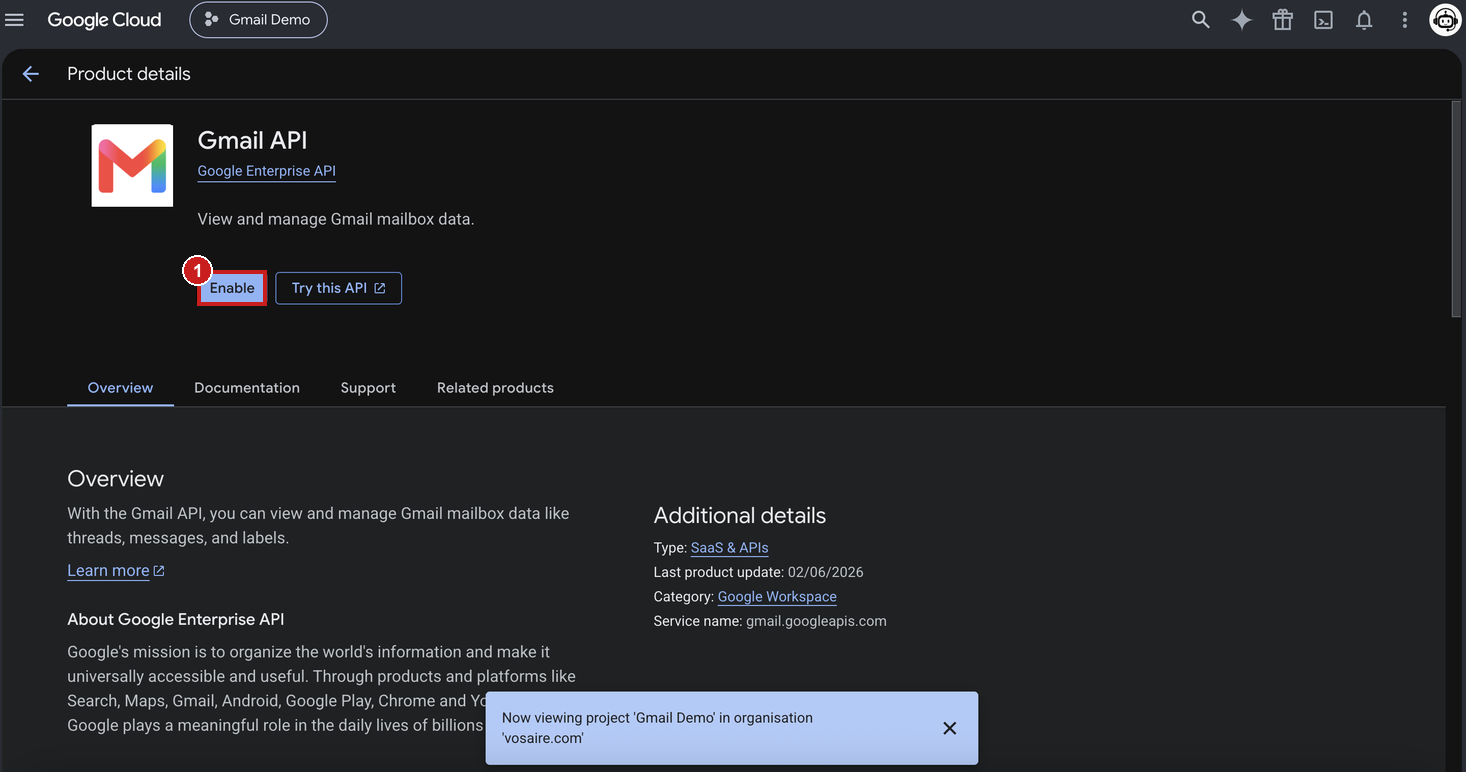
Click Enable.
3. Configure the OAuth consent screen as Internal
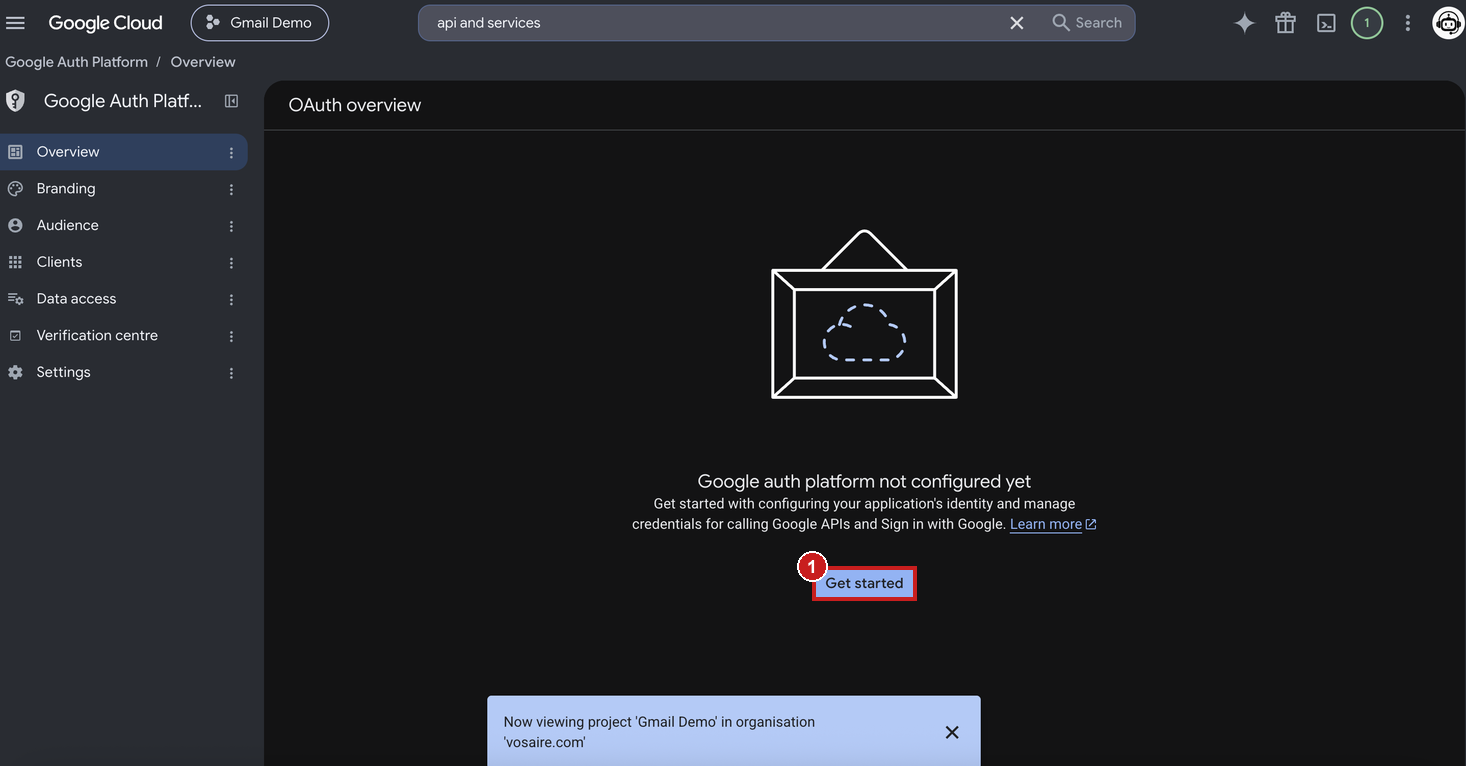
Open Google Auth Platform (search "api and services" from the top bar, or find it in the left nav) and click Get started.
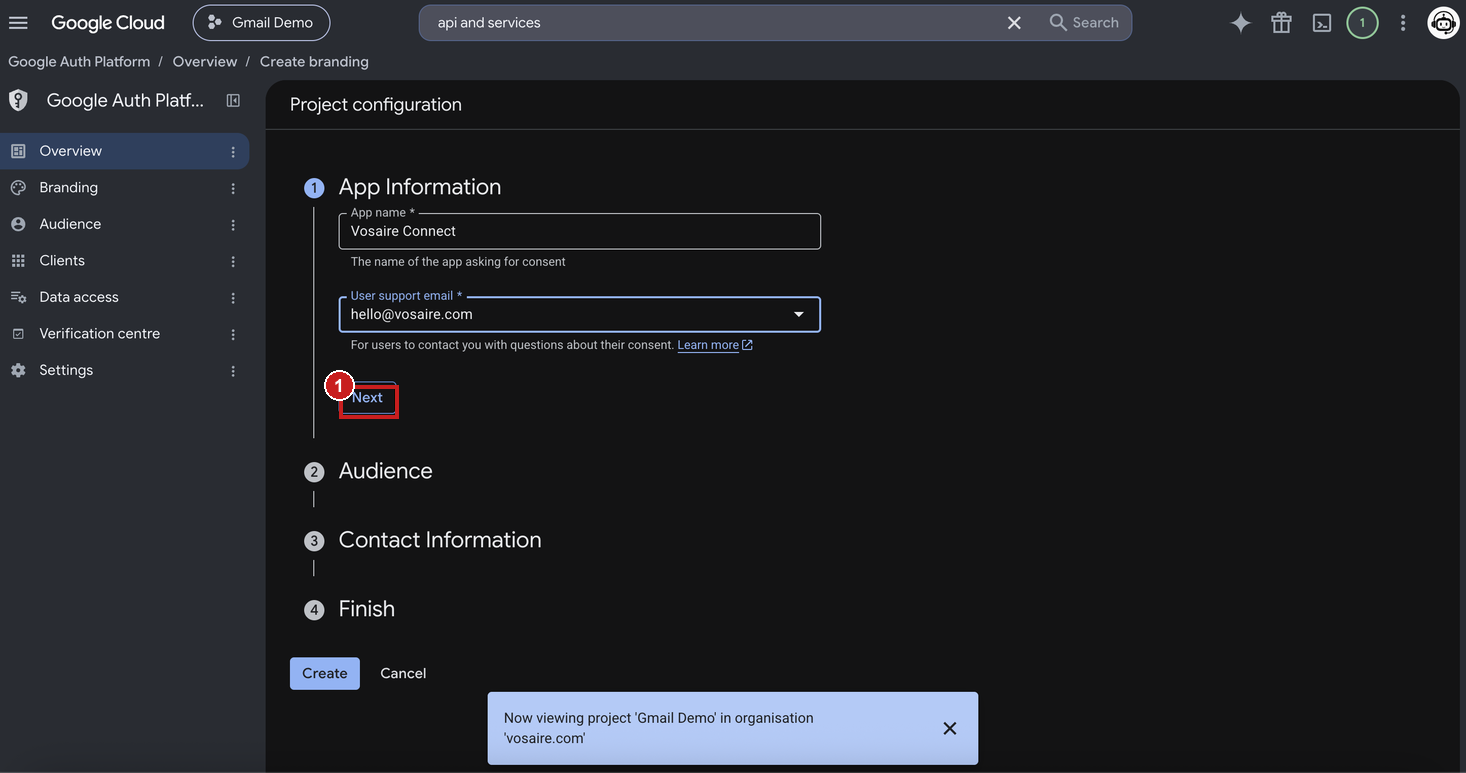
Fill in App Information — an app name and a support email — then click Next.
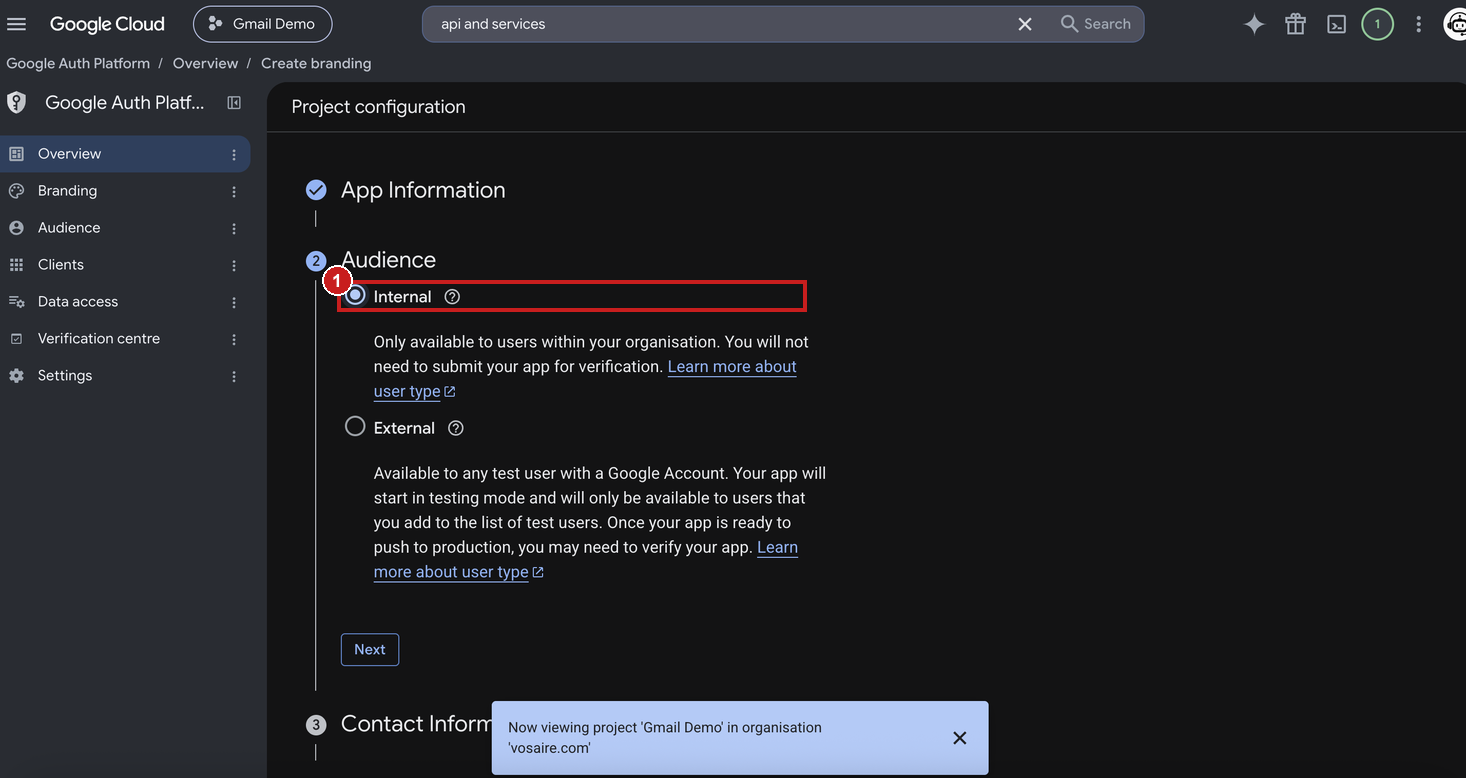
Under Audience, choose Internal. This is the step that skips Google's verification requirement and the 7-day token expiry — it only shows up because the project belongs to a Workspace organisation.
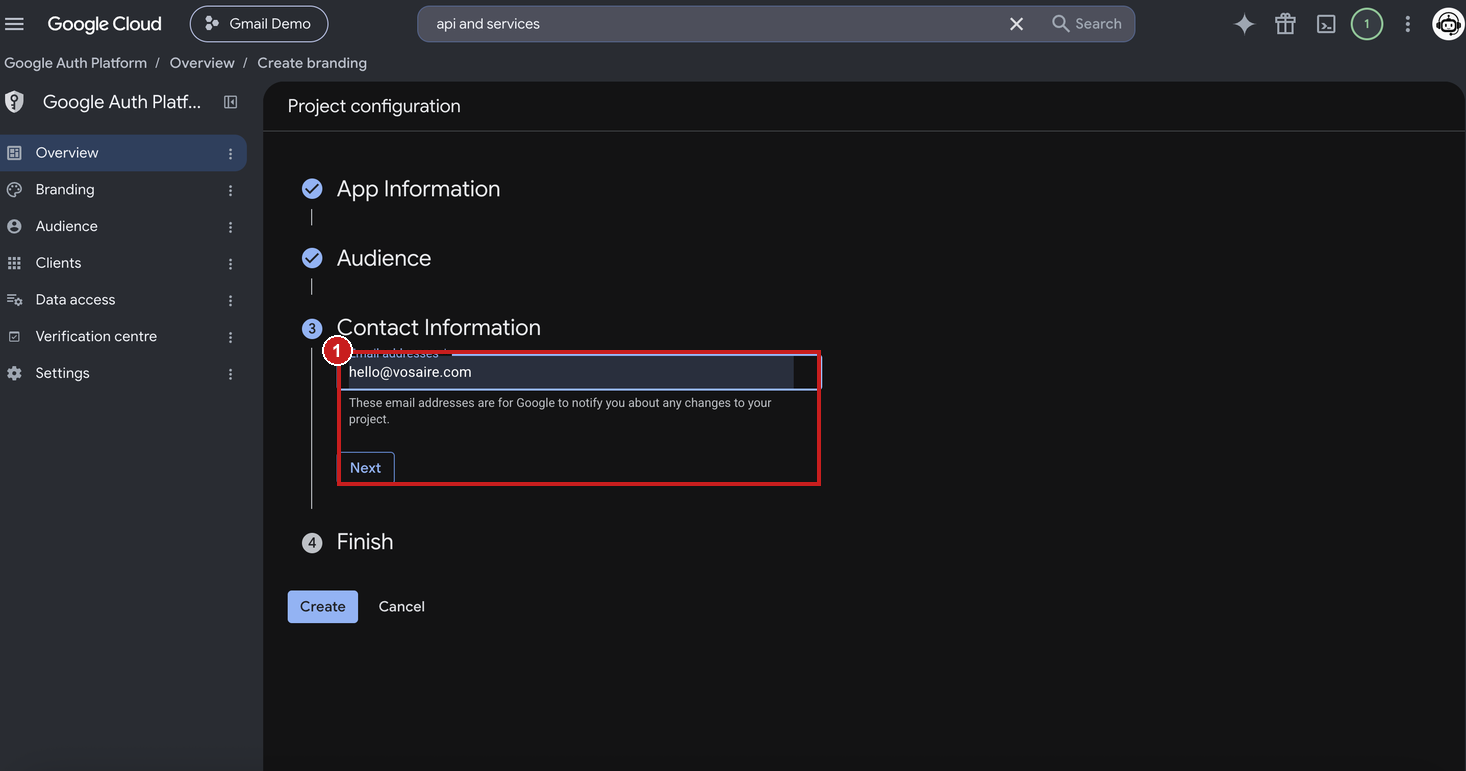
Add a contact email under Contact Information and click Next.
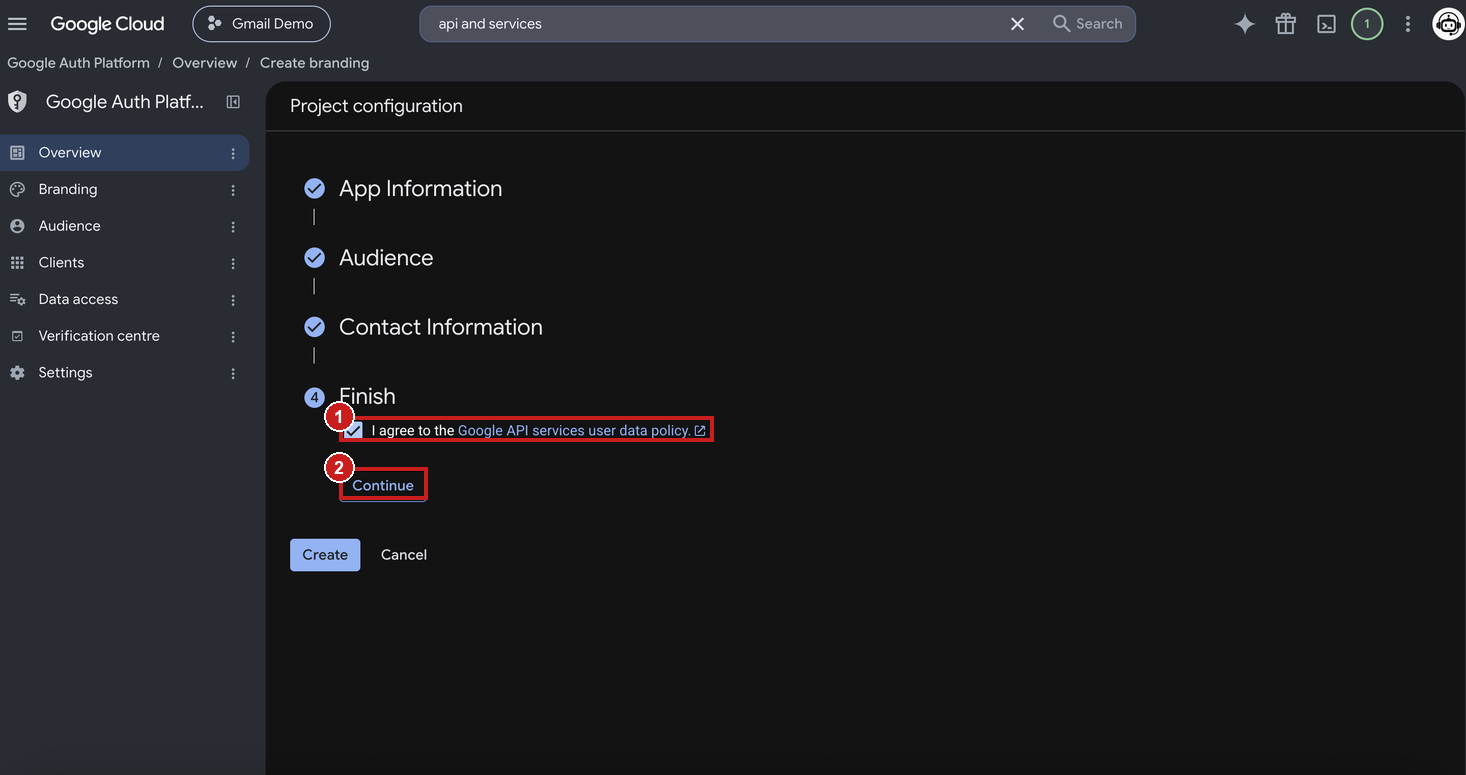
On Finish, agree to the Google API services user data policy and click Continue, then Create.
4. Add the Gmail scopes
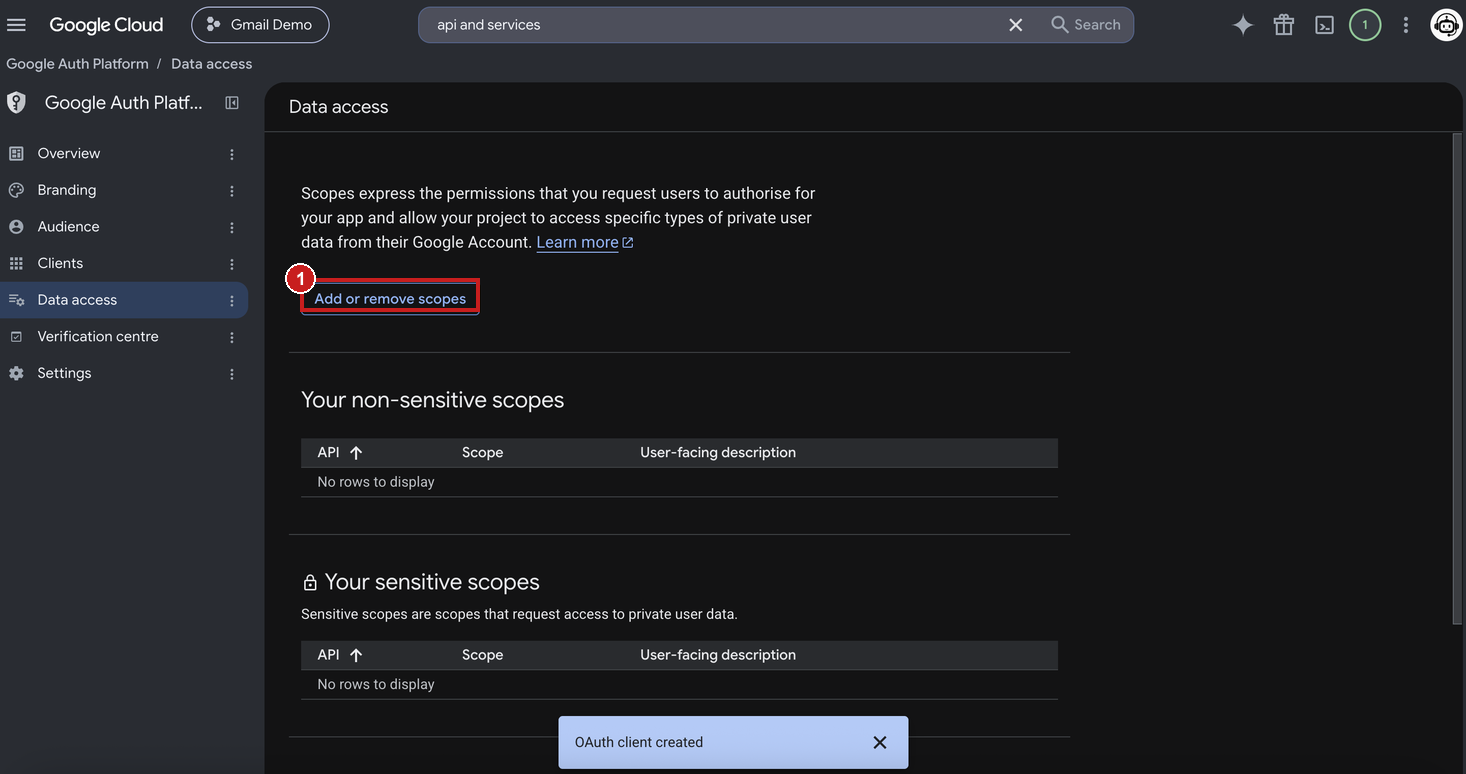
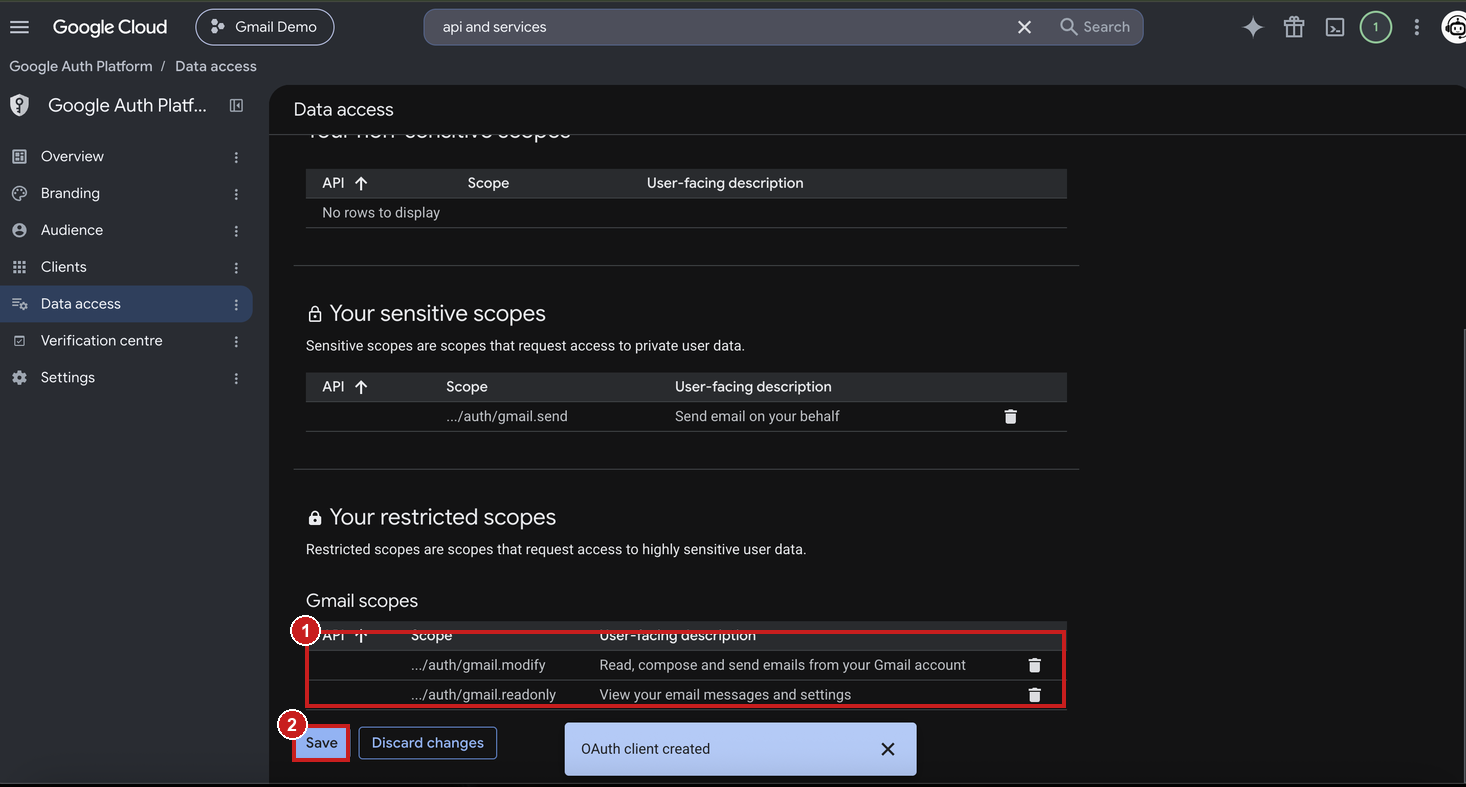
From the Google Auth Platform left nav, go to Data access, then click Add or remove scopes.
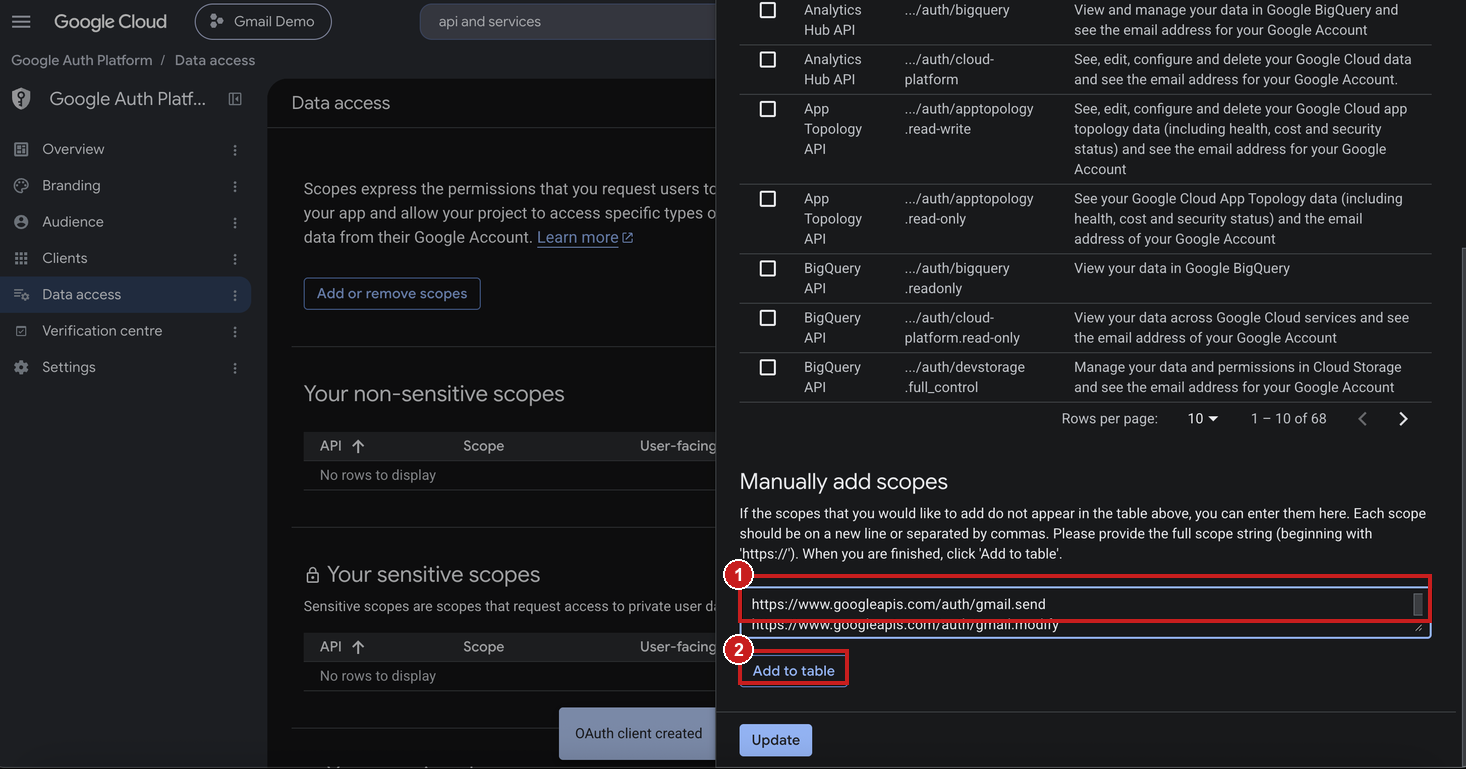
In the panel that opens, scroll to Manually add scopes and paste in the three full scope paths below, one per line, then click Add to table:
https://www.googleapis.com/auth/gmail.readonly
https://www.googleapis.com/auth/gmail.send
https://www.googleapis.com/auth/gmail.modify
Confirm all three now show as checked in the list...
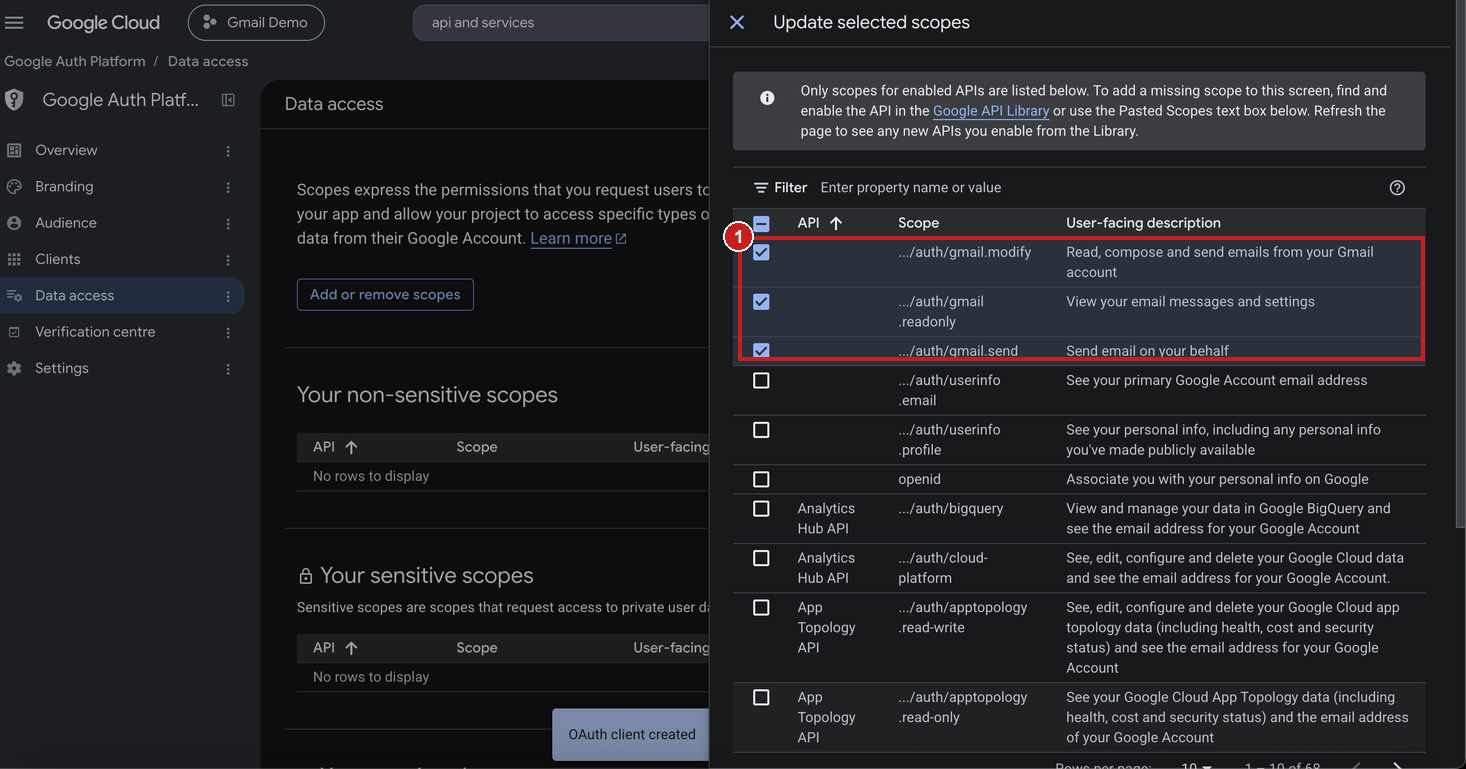
...then click Save on the Data access page.
5. Create the OAuth client
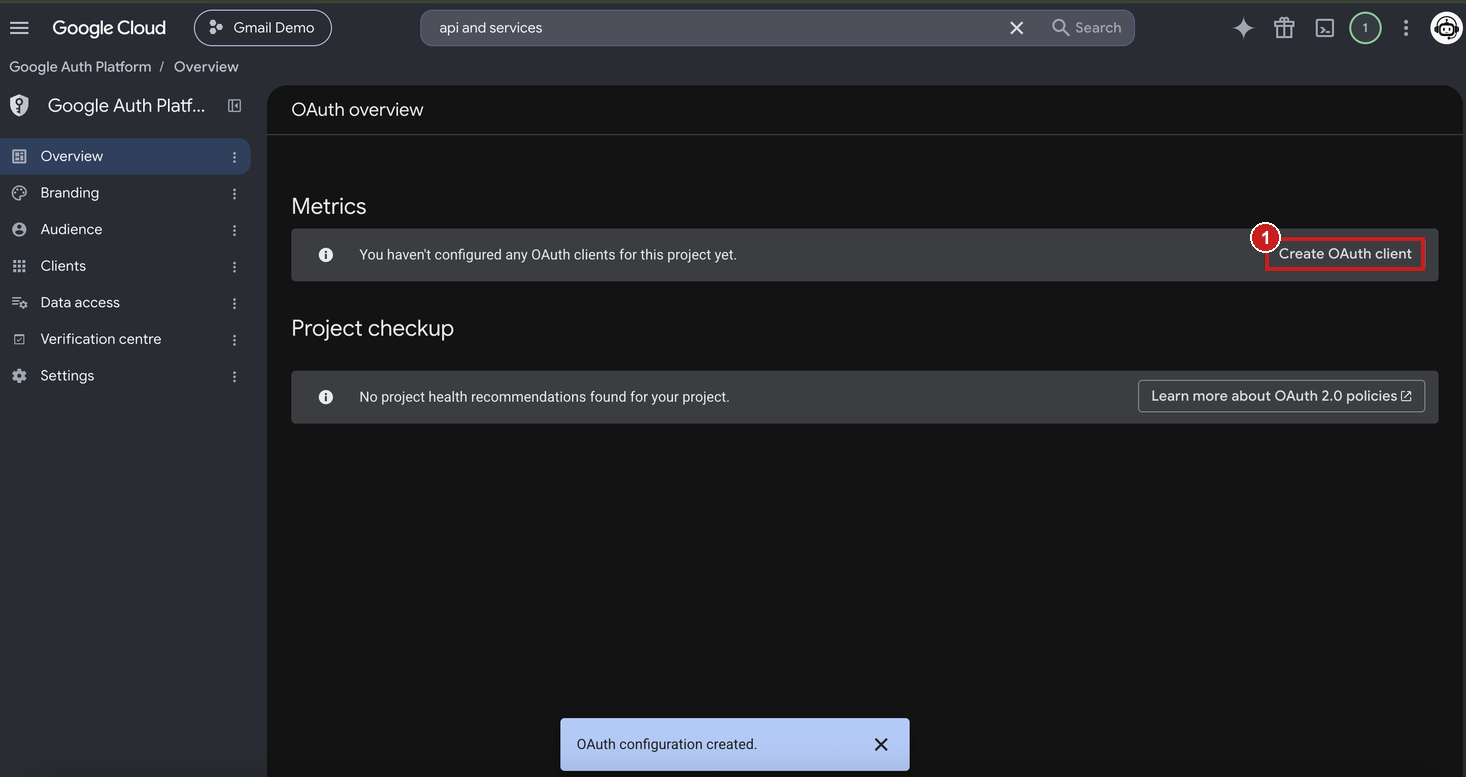
Back on the Google Auth Platform overview, click Create OAuth client.
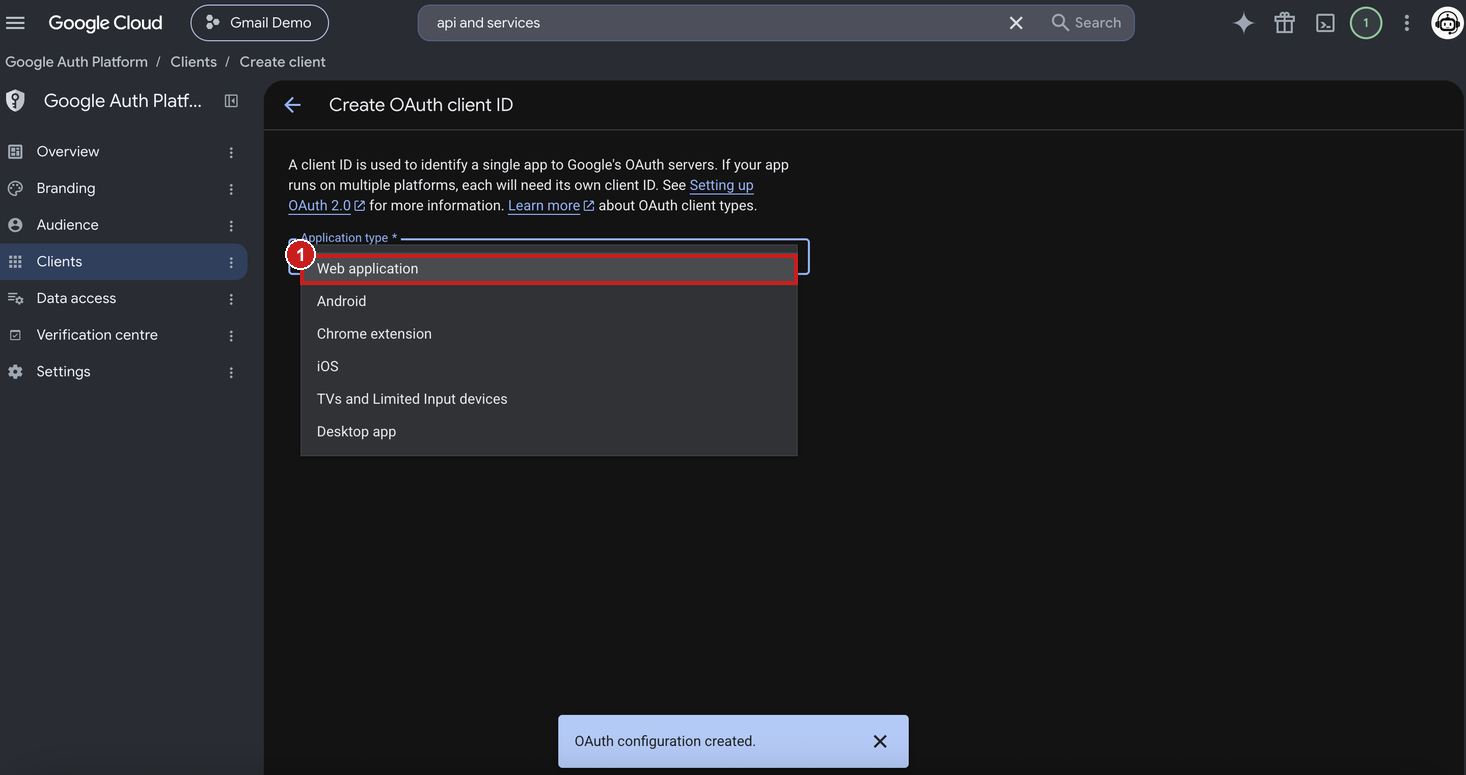
Choose Web application as the application type.
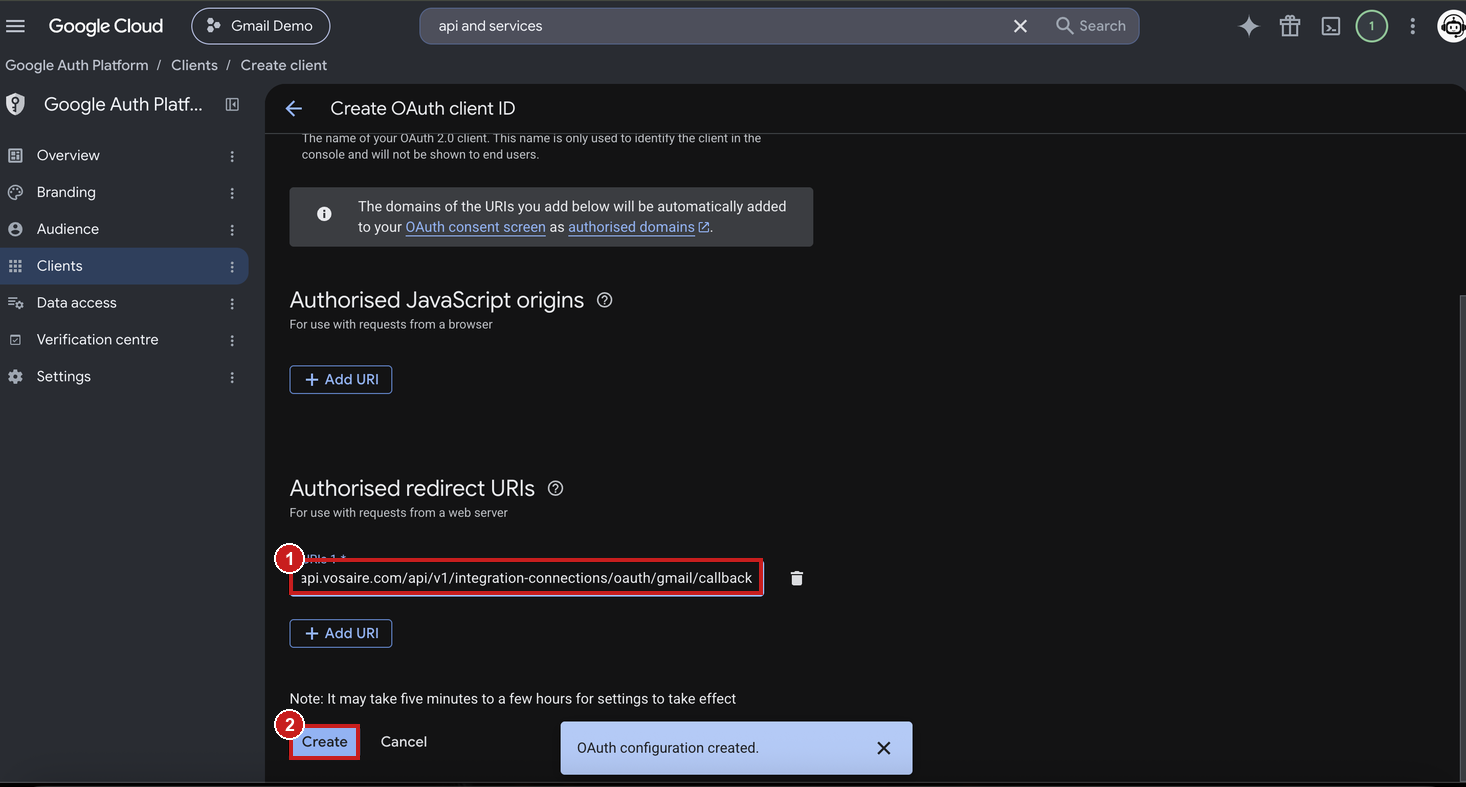
Name it whatever you like, and under Authorised redirect URIs add:
https://api.vosaire.com/api/v1/integration-connections/oauth/gmail/callback
then click Create.
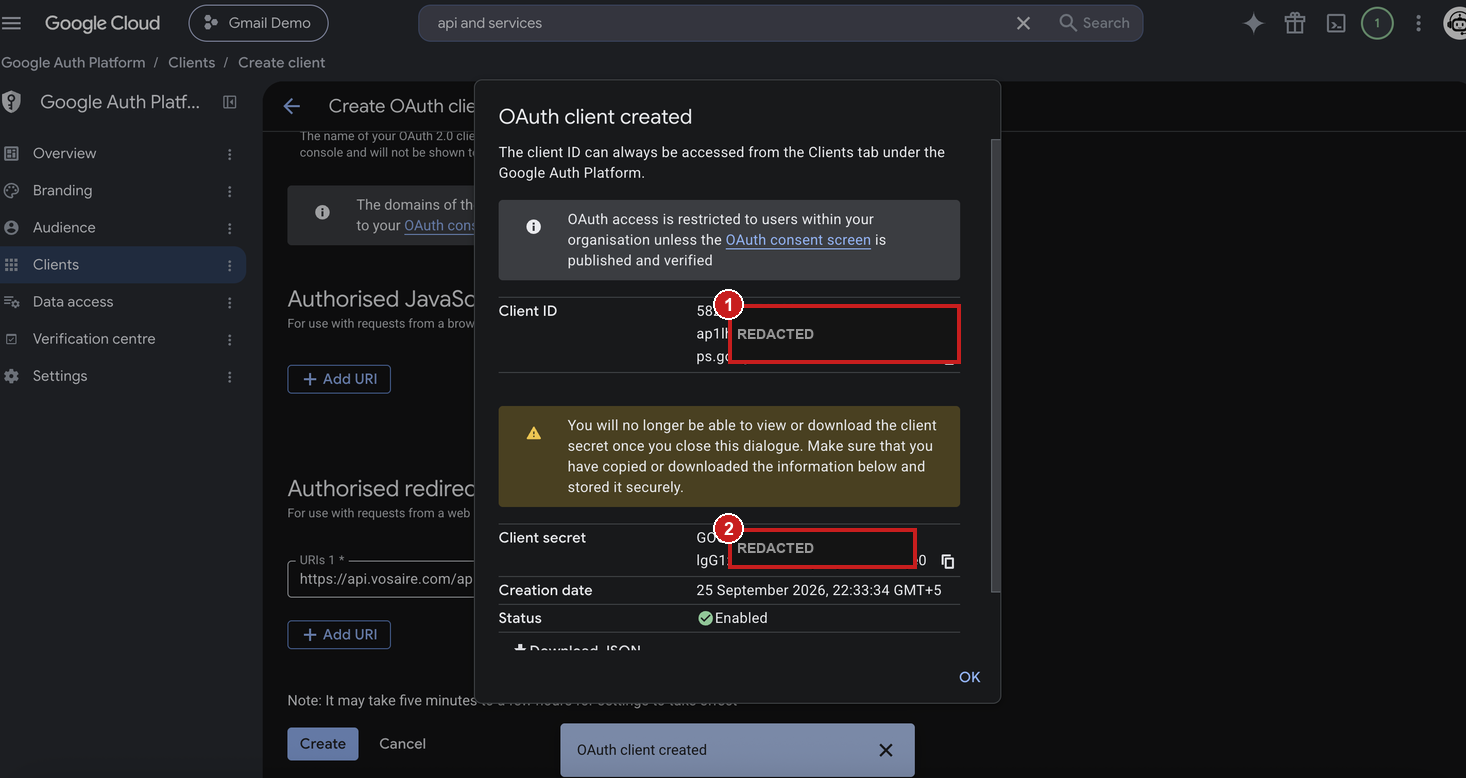
6. Copy the Client ID and Client Secret
Google shows the credentials exactly once — copy both before closing this dialog. You won't be able to view the secret again afterward (though you can always generate a new one from the Clients tab if you lose it).
7. Connect it in Vosaire
In Vosaire, go to Channels → Add a channel → Gmail → Custom Google Workspace tab. The redirect URI field is already filled in for you — paste in your Client ID and Client Secret, then click Save & Authorize with Google.
8. Sign in
Sign in with the Workspace account whose inbox you want Vosaire to reply from, and grant the requested permissions.
If "Internal" isn't available
"Internal" only appears as an option if your Google Cloud project belongs to a Google Workspace organization — a personal Gmail account never has this option. If you're a member of the Workspace but don't see it, your admin may have restricted who can create Cloud projects; ask them to create the project (or grant you permission), then continue from step 2 (Enable the Gmail API).
Some Workspace admins also restrict which third-party apps can be used at all, under Admin Console → Security → API Controls → App access control. If authorization fails at the Google sign-in step, check with your admin that custom/unconfigured apps are allowed for your domain.
If you get stuck
Email support@vosaire.com and we'll walk through the Google Cloud Console setup with you live.
What happens after connecting
Same as the standard Gmail connection — incoming emails to that inbox generate conversations Vosaire can respond to using the same training data and actions as the widget, visible in Conversations alongside widget and other channel conversations.